Websockets API
WebSockets is a way for a client instance of a website to communicate with the server in real-time. From the MDN entry:
The WebSocket API is an advanced technology that makes it possible to open a two-way interactive communication session between the user's browser and a server.
This is typically used for features like chat-boxes, that require instantaneous communication. In this post we will develop the Deno server we created in the last post into a collaborative, pink-square-drawing, net-art type-thing.
Picking up where we left off in the previous post, our file structure should look like this:
deno_server
┣━━ public
┃   ┣━━ index.html
┃   ┣━━ script.js
┃   ┗━━ favicon.ico
┗━━ server.js
In the server.js file you will note that I have refactored the handler () function definition slightly to do the same thing but with less code:
import { serve } from "https://deno.land/std@0.157.0/http/server.ts"
import { serveDir } from "https://deno.land/std@0.157.0/http/file_server.ts"

serve (handler, { port: 80 })

function handler (incoming_req) {
    let req = incoming_req

    // if the requested url does not specify a filename
    if (req.url.endsWith (`/`)) {

        // add 'index.html' to the url
        req = new Request (`${ req.url }index.html`, req)
    }

    const options = {

        // route requests to this
        // directory in the file system
        fsRoot: `public`
    }

    return serveDir (req, options)
}
Let's take a moment to understand what's going on. The serve () function we imported from Deno's std (standard) library in the first line takes a function as its first argument, and an options object as its second argument. It instantiates a server that listens on the port specified by the port property of the options object passed in as the second argument. When the server receives a request on that port, it passes that request in to the function we gave it as its first argument. In the code above, this request (which is a Request object) is assigned to the incoming_req parameter of our handler () function, which returns a Response object containing the website located at public in our file system.
It is worth noting here that both Request and Response objects contain a .headers property, housing a Headers object, containing various bits of relevant information you can read about here. Request, Response, and Headers objects are all part of what's called the Fetch API, which essentially abstracts HTTP (Hypertext Transfer Protocol) into a set of javascript objects for our convenience.
Running the code as is, with deno run --allow-net --allow-read server.js should start a server, and print to the terminal:
Listening on http://localhost:80/If we cycle to a browser and navigate to the URL localhost, we can see that the static site in the public folder of our project is being served to the browser. Back in the terminal, we should see three additional logs:
[2022-10-03 10:51:23] [GET] /index.html 304
[2022-10-03 10:51:24] [GET] /script.js 200
[2022-10-03 10:51:24] [GET] /favicon.ico 304
These logs are telling us that the server received three GET requests, one for each of the file assets available in the public folder. The type of request is specified on the .method property of the Request object (you can read about the different request methods here). The numbers at the end of the logs are status codes (which you can read about here).
Requests
Let's find out a bit more about the Request objects being passed into our handler () function, by inserting a console.log ():
function handler (incoming_req) {

    console.log (incoming_req)

    let req = incoming_req

    if (req.url.endsWith (`/`)) {
        req = new Request (`${ req.url }index.html`, req)
    }

    const options = {
        fsRoot: `public`
    }

    return serveDir (req, options)
}
Reboot the server by pressing ctrl + C in the terminal, and rerunning deno run --allow-net --allow-read server.js. Now when we reload the page at localhost, each of the request objects are logged to the terminal. They should each look similar to this:
Request {
  bodyUsed: false,
  headers: Headers {
  accept: "text/html,application/xhtml+xml,application/xml;q=0.9,image/avif,image/webp,image/apng,*/*;q=0.8",
  "accept-encoding": "gzip, deflate, br",
  "accept-language": "en-GB,en-US;q=0.9,en;q=0.8",
  "cache-control": "max-age=0",
  connection: "keep-alive",
  host: "localhost",
  "if-modified-since": "Sun, 02 Oct 2022 20:59:51 GMT",
  "if-none-match": "W/774e7262",
  "sec-fetch-dest": "document",
  "sec-fetch-mode": "navigate",
  "sec-fetch-site": "none",
  "sec-fetch-user": "?1",
  "sec-gpc": "1",
  "upgrade-insecure-requests": "1",
  "user-agent": "Mozilla/5.0 (Macintosh; Intel Mac OS X 10_15_7) AppleWebKit/537.36 (KHTML, like Gecko) Chrome/106.0...."
},
  method: "GET",
  redirect: "follow",
  url: "http://localhost/"
}
Right now we are most interested in the .headers property. Let's log this to the terminal by specifying console.log (incoming_req.headers), and restarting the server. When we reload localhost the result in terminal should look pretty similar, but we have filtered out some of the other information held in the Request objects coming in.
Upgrading
We can see from these logs that the client is sending requests to the server, which is evidently sending responses back, as evidenced by the website rendered to the browser window. These communications between the client and the server happen via HTTP. If we want to use websockets, we will need to upgrade from the existing HTTP connection to a websocket connection. You can read about the protocol upgrade mechanism here.
On the client side, this is fairly simple to do using the WebSocket API, simply by instantiating a new WebSocket () and passing in the address of the websocket server we would like to make a connection with. In this case, our server is living at localhost, so we can use the address: ws://localhost/ - when we deploy our code to the internet we will need to change this address to point to the URL where our server will be.
For the moment, let's add this line of code to the top of our script.js file in our public folder.
const socket = new WebSocket (`ws://localhost/`)

document.body.style.margin   = 0
document.body.style.overflow = `hidden`

const cnv = document.createElement (`canvas`)
cnv.width  = innerWidth
cnv.height = innerHeight

document.body.appendChild (cnv)

const ctx = cnv.getContext (`2d`)
ctx.fillStyle = `turquoise`
ctx.fillRect (0, 0, cnv.width, cnv.height)

const side = Math.min (cnv.width, cnv.height) / 3
const x_pos = (cnv.width / 2)  - (side / 2)
const y_pos = (cnv.height / 2) - (side / 2)

ctx.fillStyle = `deeppink`
ctx.fillRect (x_pos, y_pos, side, side)
Now when we rerun the server, and reload the client, we should see an extra header object get printed to the terminal. It is directly after the GET request for the script.js asset, and before the header comes in associated with the GET request for the favicon.ico asset -- an extra GET request for the index.html.
Let's take a closer look:
Headers {
  "accept-encoding": "gzip, deflate, br",
  "accept-language": "en-GB,en-US;q=0.9,en;q=0.8",
  "cache-control": "no-cache",
  connection: "Upgrade",
  host: "localhost",
  origin: "http://localhost",
  pragma: "no-cache",
  "sec-websocket-extensions": "permessage-deflate; client_max_window_bits",
  "sec-websocket-key": "tzB9sJOL6I4S9qymyMcYvw==",
  "sec-websocket-version": "13",
  upgrade: "websocket",
  "user-agent": "Mozilla/5.0 (Macintosh; Intel Mac OS X 10_15_7) AppleWebKit/537.36 (KHTML, like Gecko) Chrome/106.0...."
}
We can note two differences between the two GET requests for index.html. The .connection property in the header for the second request is "Upgrade" rather than "keep-alive", and there exists an upgrade property on the second request, where there was none on the first. This is our WebSocket object trying to phone home.
Unfortunately, while we can see the upgrade request at the server, we have not instructed the server to do anything with it yet, and the websocket connection fails, as evidenced by the message in the browser's console:
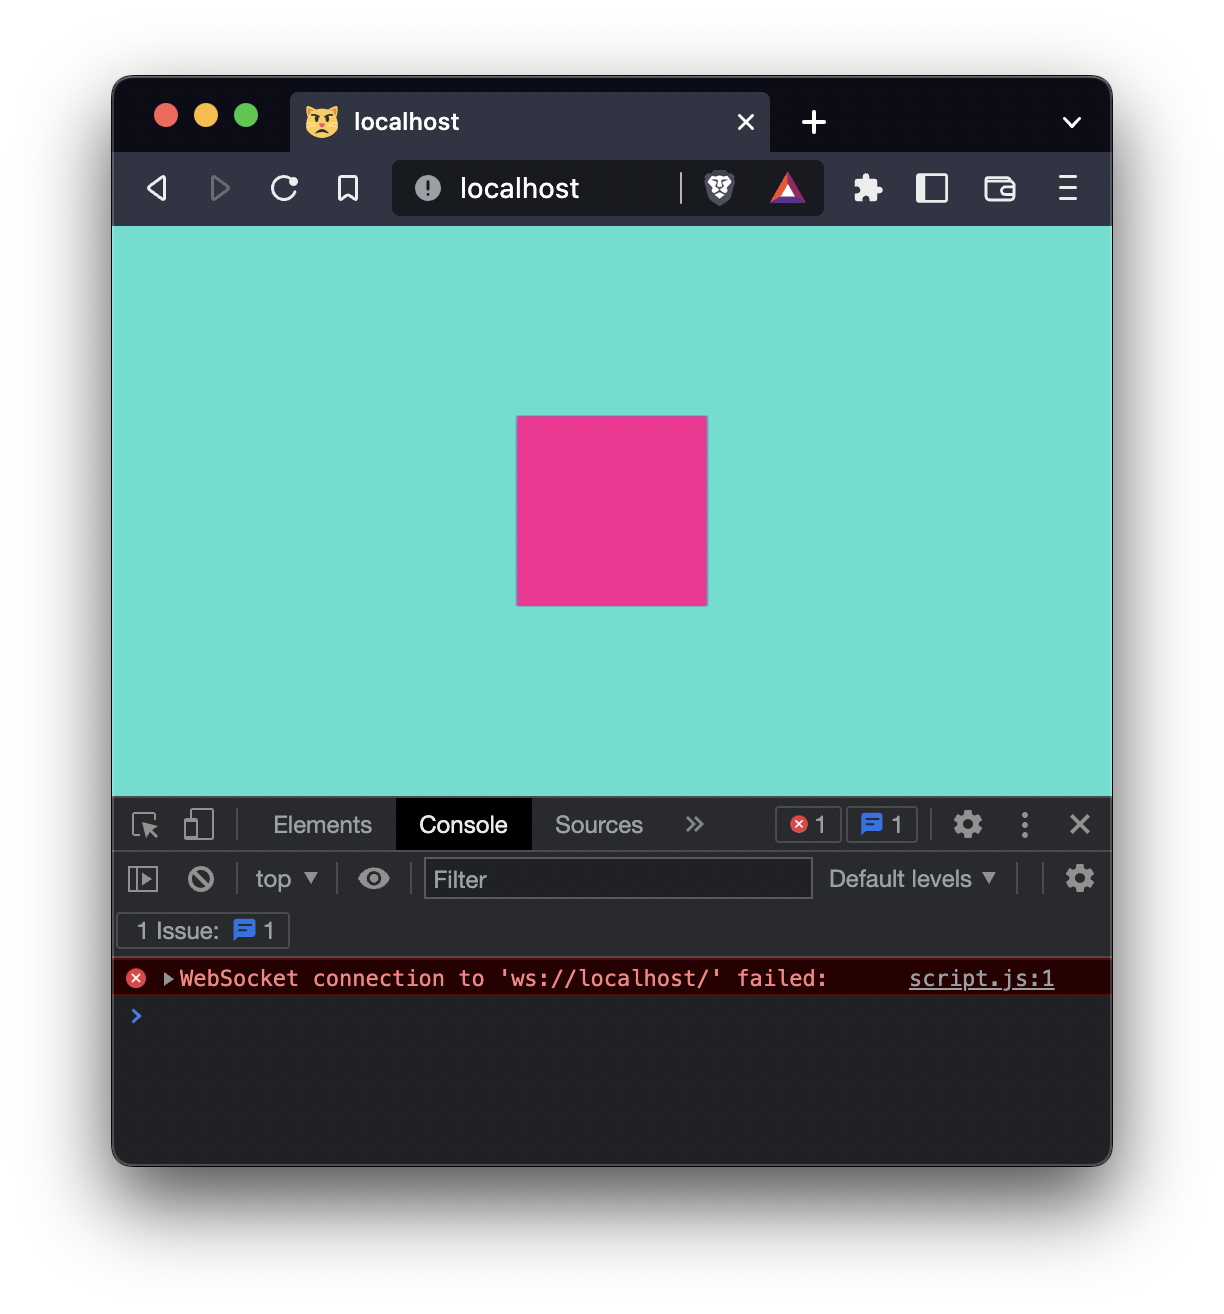
To get our server to respond, we will be using Deno.upgradeWebSocket (). In the Deno documentation for this function, which you can read here (and here), we find:
Given a request, returns a pair of WebSocket and Response.
The assignment operation in example given looks something like this:
const { socket, response } = Deno.upgradeWebSocket (req)The syntax here, with the curly braces around the variable names, is called destructuring assignment, which is a syntactically concise way to make properties of an encapsulated object available as variables in the current scope. In this example, the Deno.upgradeWebSocket () function returns an object with .socket and .response properties. Since we are not so interested in the object itself, we can bypass assignment of that object completely, and just assign the properties we want to the names they already have, but in the current scope instead of as properties of the object.
Functionally, the code does the same thing as this:
const upgrade_object = Deno.upgradeWebSocket (req)
const socket   = upgrade_object.socket
const response = upgrade_object.response
The import statements at the top of server.js also use destructuring in this way.
Back in the documentation, we can note:
The original request must be responded to with the returned response for the websocket upgrade to be successful.
So in order to establish a websocket connection, we need to engineer some logic into our handler () function so it returns the Response object returned by Deno.upgradeWebSocket () if it notices that the request it is handling is an upgrade request. We noticed before that the upgrade request had a property called .upgrade in its headers, with the value "websocket". In order to engineer some conditional logic that uses this, we need to make sure the code can deal with requests that do not have the .upgrade property in their header at all.
The following code uses the OR operator ||, which you can read about here. If the .get () method of the Headers object returns null (ie. if there is no .upgrade property in the header), the OR operator (||) will assign an empty string to the variable upgrade. The .toLowerCase () method can then be safely called on the string stored in upgrade to catch any cases in which the string may contain capital letters, and finally checked for equivalence with the string "websocket":
const upgrade = req.headers.get ("upgrade") || ""

if (upgrade.toLowerCase() == "websocket") {
    // deal with upgrade request here
}
Inserting code which retrieves and returns the Response object via the Deno.upgradeWebSocket (), our handler () function definition should look like this:
function handler (incoming_req) {

    let req = incoming_req

    const upgrade = req.headers.get ("upgrade") || ""

    // check if it is an upgrade request
    if (upgrade.toLowerCase() == "websocket") {
        const { socket, response } = Deno.upgradeWebSocket (req)
        return response
    }

    if (req.url.endsWith (`/`)) {
        req = new Request (`${ req.url }index.html`, req)
    }

    const options = {
        fsRoot: `public`
    }

    return serveDir (req, options)
}
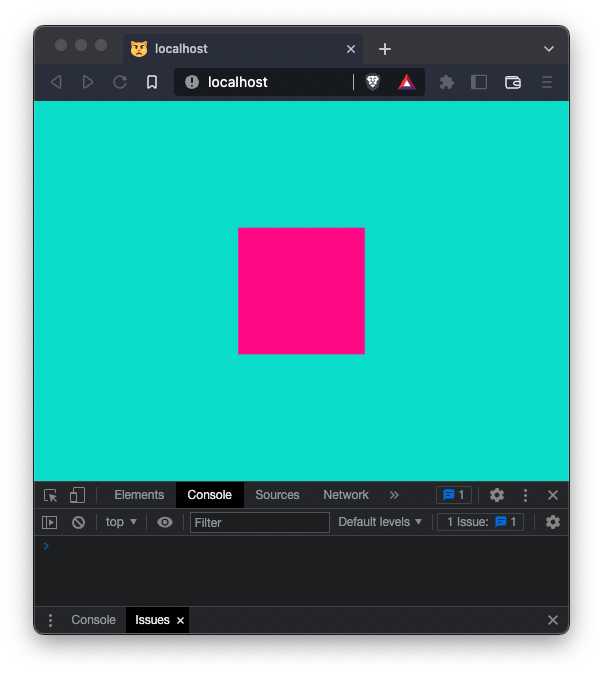
Saving server.js, restarting the server, and reloading the client should show that the connection failed error message is not showing any more -- a good sign:
WebSocket Events & Methods
Now let's look at the socket objects - there are two, one at the server and one at the client. Both happen to be assigned to variables named socket within their respective scopes.
As is noted here:
Because the WebSocket protocol is symmetrical, the
WebSocketobject is identical to the one that can be used for client side communication. Documentation for it can be found on MDN.
Ie. once the websocket connection has been made, the socket objects on both sides work in the same way. There are two methods: .close () and .send (), and four events: close, error, message, and open. Handler functions assigned to the socket's respective .onevent properties behave as event listeners.
Let's examine the open event. In the script.js file in the public folder, add:
const socket = new WebSocket (`ws://localhost/`)
socket.onopen = () => console.log (`client websocket opened!`)
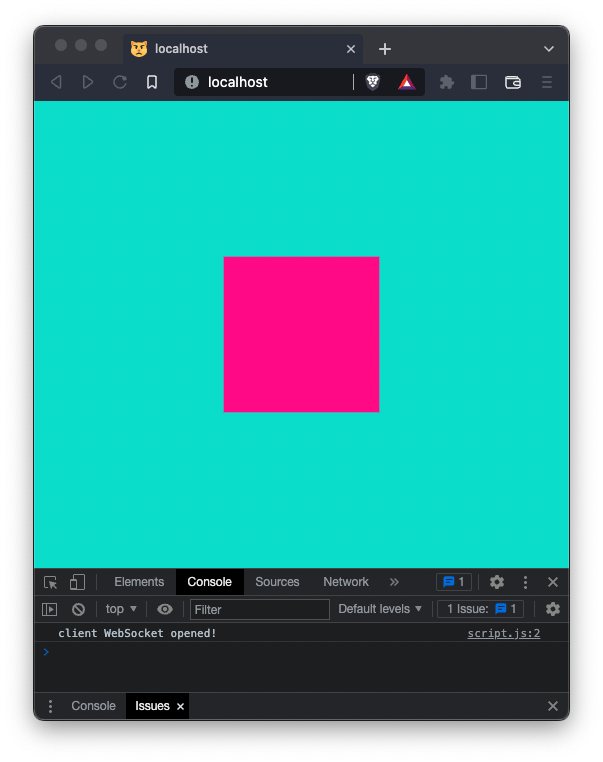
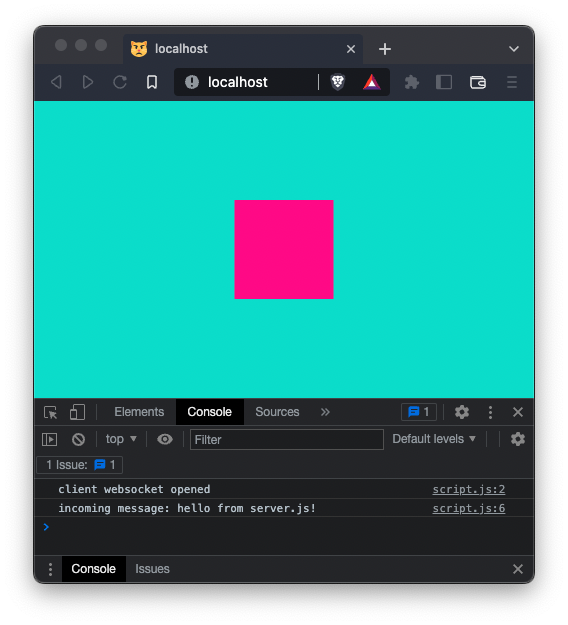
Here we are assigning an arrow function to the socket's .onopen property. Restarting the server and reloading the website should display client websocket opened! in the browser's console:
We can do a similar thing in server.js:
if (upgrade.toLowerCase() == "websocket") {
    const { socket, response } = Deno.upgradeWebSocket (req)
    socket.onopen = () => console.log (`server websocket opened!`)
    return response
}
Which should log a message to the terminal like this:
Listening on http://localhost:80/
[2022-10-04 01:13:42] [GET] /index.html 304
[2022-10-04 01:13:42] [GET] /script.js 304
server websocket opened!
[2022-10-04 01:13:43] [GET] /favicon.ico 304
In the client (script.js in public), we can add event listeners for close, error, and message events:
const socket = new WebSocket (`ws://localhost/`)
socket.onopen  = () => console.log (`client websocket opened!`)
socket.onclose = () => console.log (`client websocket closed!`)
socket.onerror   = e => console.dir (e)
socket.onmessage = e => console.dir (e)
... and do a similar thing in the server (server.js):
if (upgrade.toLowerCase() == "websocket") {
    const { socket, response } = Deno.upgradeWebSocket (req)
    socket.onopen  = () => console.log (`server websocket opened!`)
    socket.onclose = () => console.log (`server websocket closed!`)
    socket.onerror   = e => console.dir (e)
    socket.onmessage = e => console.dir (e)

    return response
}
In the client, if we exit the server once a websocket connection has been established, we can see client websocket closed! displayed in the console. Similarly, if we navigate to another page from localhost in the browser, we can see the server print server websocket closed! to the terminal.
It will come as no surprise that calling socket.close (), with something like:
document.body.onclick = e => socket.close ()... also closes the websocket.
Once the socket is open, let's use the .send () method to ask the server to send a message to the client that says "hello from server.js":
if (upgrade.toLowerCase() == "websocket") {
    const { socket, response } = Deno.upgradeWebSocket (req)

    socket.onopen  = () => {
        console.log (`server WebSocket opened!`)

        // sending a message to the client
        socket.send (`hello from server.js!`)
    }

    socket.onclose = () => console.log (`server WebSocket closed!`)
    socket.onerror = e  => console.dir (e)

    return response
}
We can see the MessageEvent object displayed in the console:
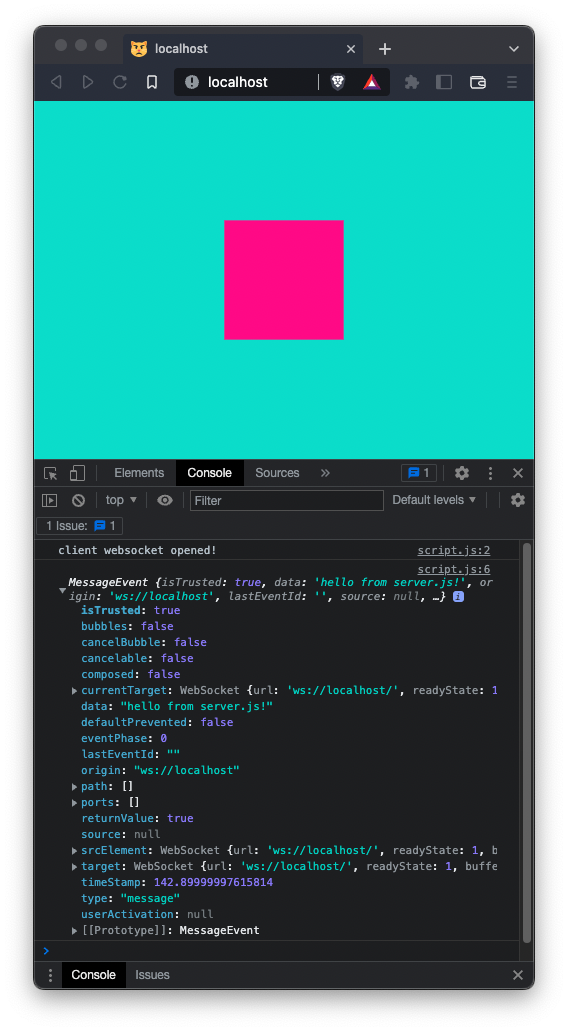
On the .data property, we can read the value: "hello from server.js!"
We can adjust the client code to format our message better, and send a message back:
const socket = new WebSocket (`ws://localhost/`)
socket.onopen  = () => console.log (`client websocket opened`)
socket.onclose = () => console.log (`client websocket closed`)
socket.onerror   = e => console.dir (e)
socket.onmessage = e => {
    console.dir (`incoming message: ${ e.data }`)
    socket.send (`hello to you too! from script.js`)
}
... and do a similar thing on the server side:
if (upgrade.toLowerCase() == "websocket") {
    const { socket, response } = Deno.upgradeWebSocket (req)
    socket.onopen  = () => {
        console.log (`server WebSocket opened`)
        socket.send (`hello from server.js!`)
    }
    socket.onclose = () => console.log (`server WebSocket closed`)
    socket.onerror = e  => console.dir (e)
    socket.onmessage = e => {
        console.log (`incoming message: ${ e.data }`)
    }

    return response
}
Similarly, the terminal should read something like this:
[2022-10-04 11🔞08] [GET] /index.html 304
[2022-10-04 11🔞08] [GET] /script.js 304
server WebSocket opened
incoming message: hello to you too! from script.js
[2022-10-04 11🔞08] [GET] /favicon.ico 304
Client → Server → Client
In order to transmit data from one client to another, we need to do two things:
- package our data as a string, so it can be sent via websocket
- when the server receives the data from a client, instruct the server to send it on to all the other clients via websockets.
We can use JSON.stringify () to turn an object containing our data into a string, and then use JSON.parse () to turn it back into an object once it has been received on the other end. You can read about JSON.stringify () here, and JSON.parse () here.
In order to send data to all the sockets, the server needs some way of keeping track of the sockets that have been opened. When a socket is opened we could, for example, .push () it to a global array, which can then be iterated over to access all the sockets.
Consider the following server.js code:
import { serve } from "https://deno.land/std@0.158.0/http/server.ts"
import { serveDir } from "https://deno.land/std@0.158.0/http/file_server.ts"
import { getNetworkAddr } from "https://deno.land/x/local_ip/mod.ts"

const local_ip = await getNetworkAddr()
console.log (`local area network IP: ${ local_ip }`)

serve (handler, { port: 80 })

let sockets = []

function handler (incoming_req) {

    let req = incoming_req

    const upgrade = req.headers.get ("upgrade") || ""

    if (upgrade.toLowerCase() == "websocket") {

        const { socket, response } = Deno.upgradeWebSocket (req)

        socket.onopen  = () => {
            console.log (`server WebSocket opened`)

            // add the socket to the sockets array
            sockets.push (socket)
        }

        socket.onclose = () => {
            console.log (`server WebSocket closed`)

            // filters closed sockets (ie. sockets without
            // a .readyState of 1) out of the array
            sockets = sockets.filter (s => s.readyState == 1)
        }

        socket.onerror = e => console.dir (e)

        socket.onmessage = e => {
            console.log (`incoming message: ${ e.data }`)

            // send the message data back out
            // to each of the sockets in the array
            sockets.forEach (s => s.send (e.data))
        }

        return response
    }

    if (req.url.endsWith (`/`)) {
        req = new Request (`${ req.url }index.html`, req)
    }

    const options = {
        fsRoot: `public`
    }

    return serveDir (req, options)
}
... and the following script.js client code:
const socket = new WebSocket (`ws://localhost/`)
socket.onopen  = () => console.log (`client websocket opened`)
socket.onclose = () => console.log (`client websocket closed`)
socket.onerror =  e => console.dir (e)

const squares = []

socket.onmessage = e => {
    console.log (`websocket message received:`)

    // convert the string back into an object
    const pos = JSON.parse (e.data)

    // add the position object to the squares array
    squares.push (pos)

    // display the position object in the console
    console.dir (pos)
}

document.body.style.margin   = 0
document.body.style.overflow = `hidden`

const cnv = document.createElement (`canvas`)
document.body.appendChild (cnv)
cnv.width  = innerWidth
cnv.height = innerHeight

const ctx = cnv.getContext (`2d`)

requestAnimationFrame (draw_frame)

function draw_frame () {
    ctx.fillStyle = `turquoise`
    ctx.fillRect (0, 0, cnv.width, cnv.height)

    squares.forEach (s => {

        // converting the ratio back to pixels
        const x_pos = s.x_phase * cnv.width
        const y_pos = s.y_phase * cnv.height

        ctx.fillStyle = `deeppink`
        ctx.fillRect (x_pos - 10, y_pos - 10, 20, 20)
    })

    requestAnimationFrame (draw_frame)
}

document.body.onclick = e => {

    // converting the .offset positions
    // to a ratio of the total length
    // between 0 - 1
    const pos = {
        x_phase : e.offsetX / cnv.width,
        y_phase : e.offsetY / cnv.height,
    }

    // turn the pos object into a string
    const pos_string = JSON.stringify (pos)

    // send to the websocket server
    socket.send (pos_string)
}
Because we using getNetworkAddr () to find the local area network IP address, we will need to give Deno an additional --allow-run flag. Run the server with:
deno run --allow-net --allow-read --allow-run server.jsThe terminal should display:
local area network IP: 192.168.1.172
Listening on http://localhost:80.
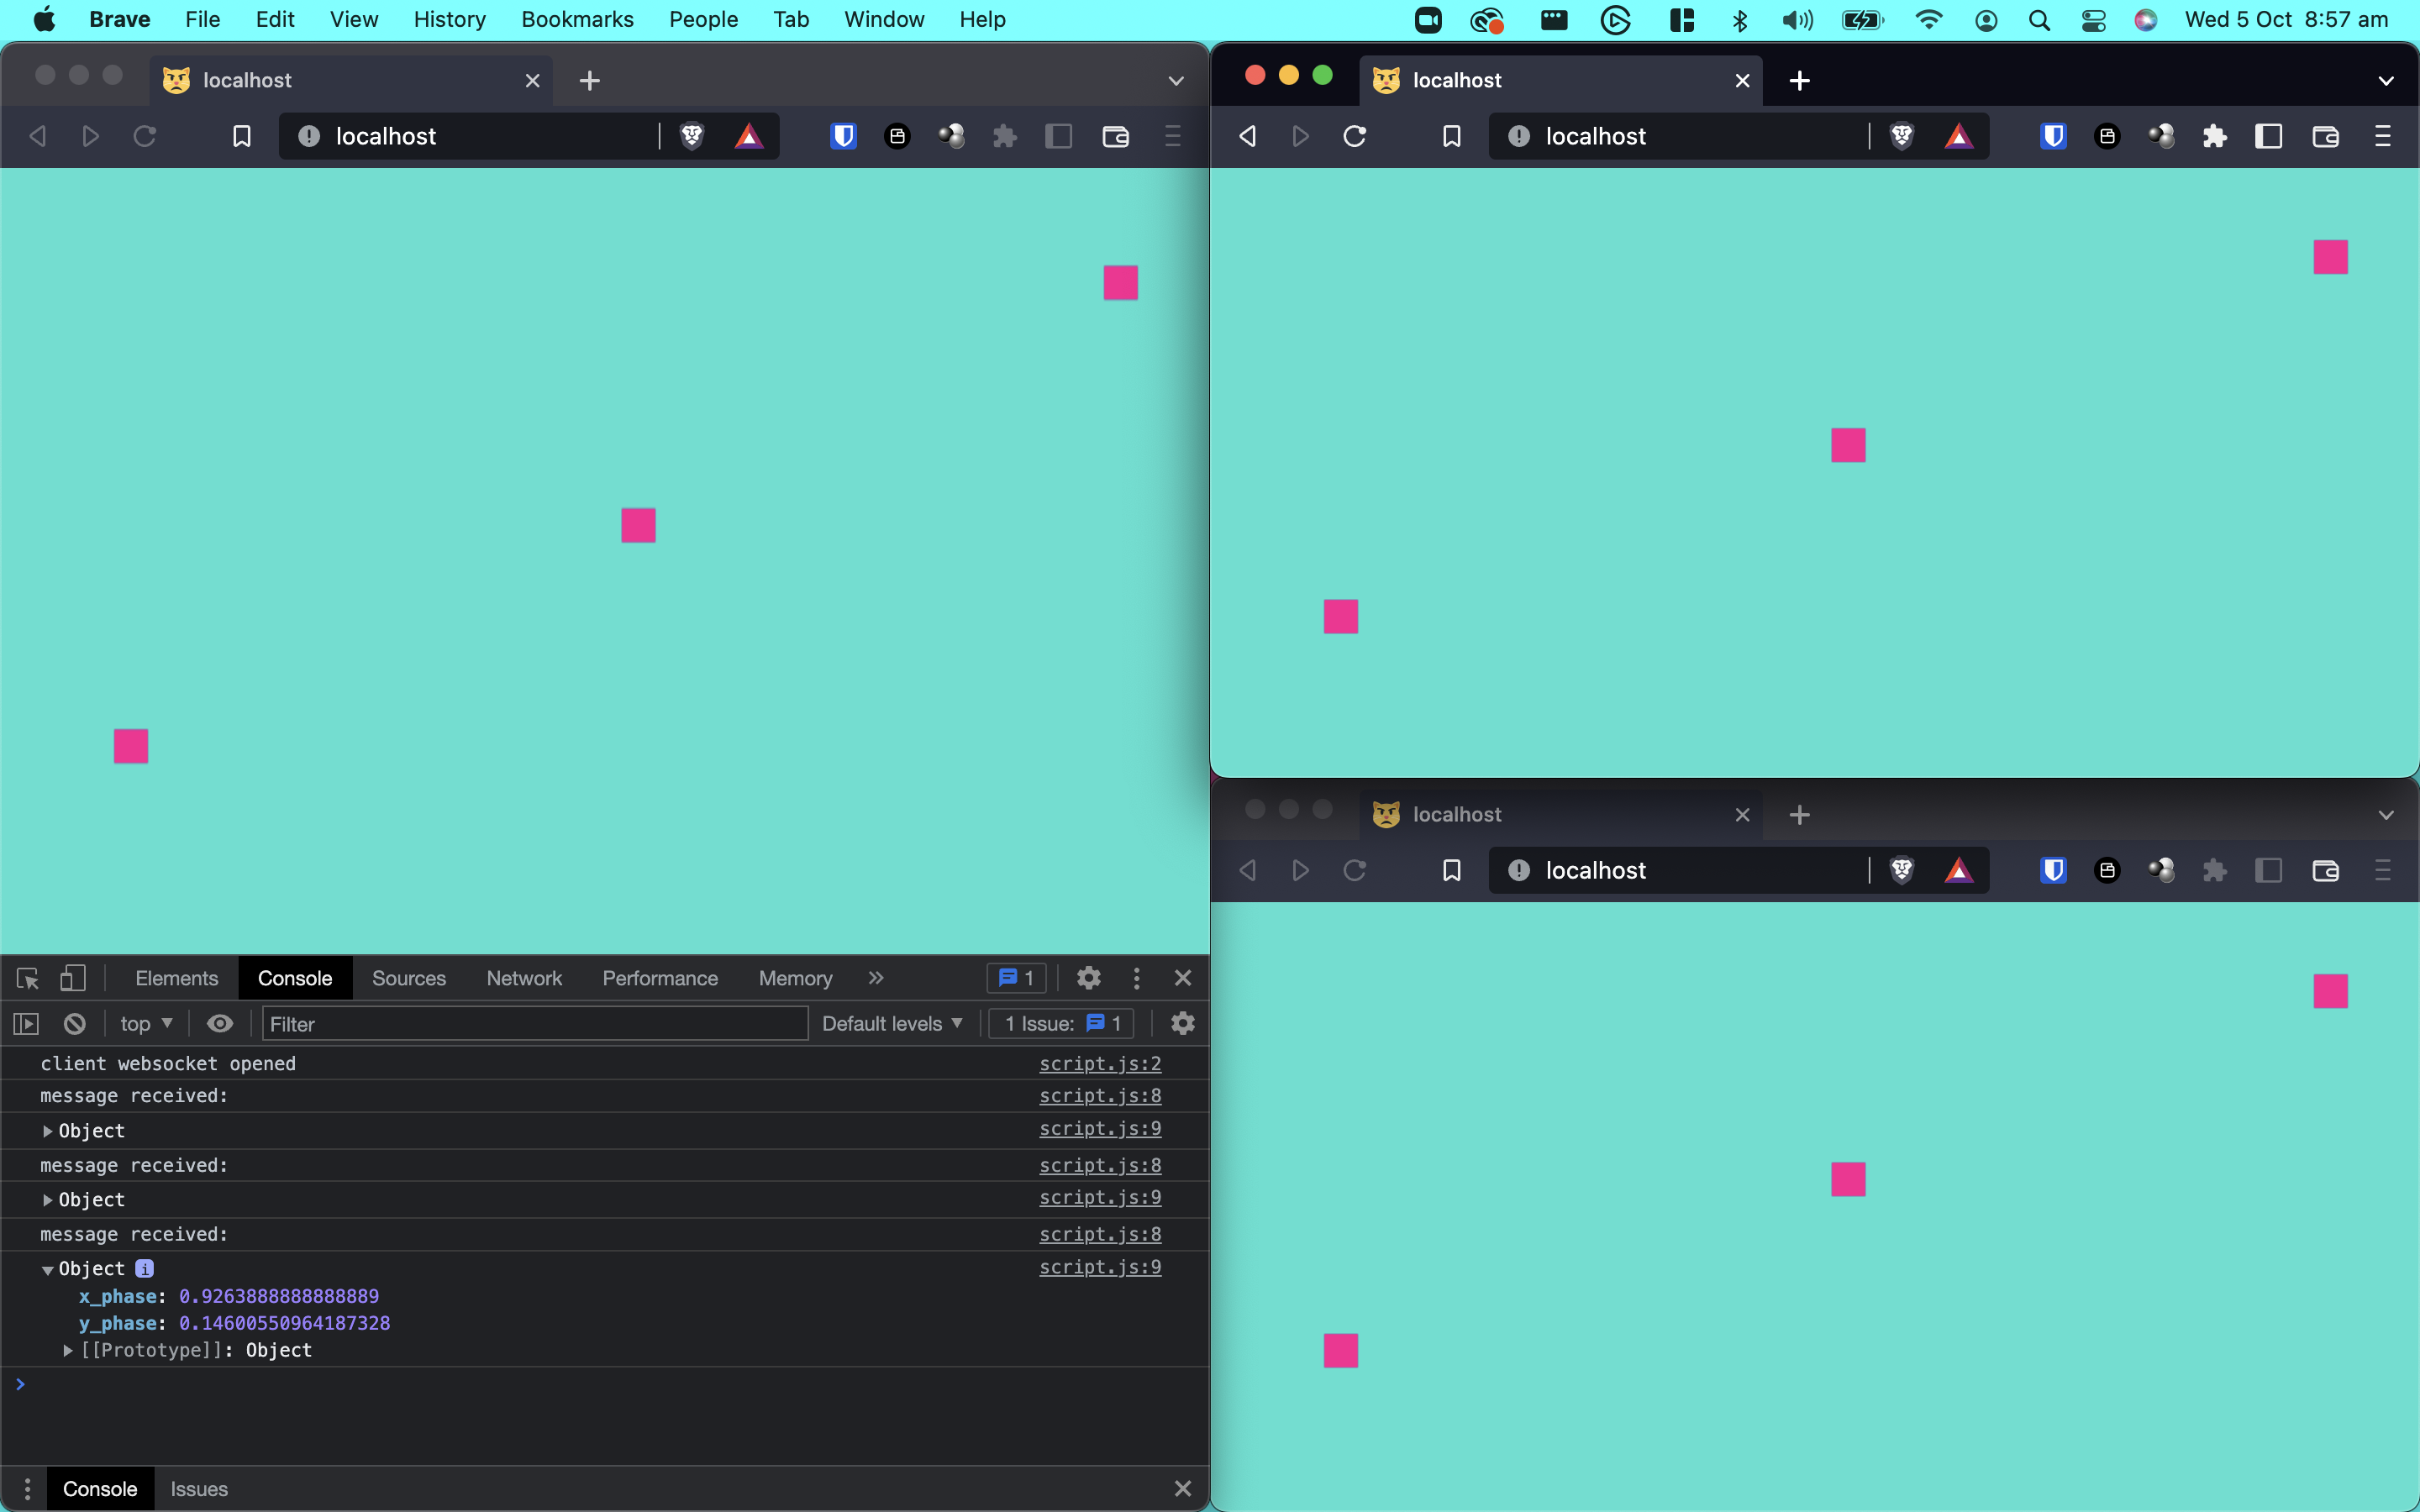
... or something similar. Open multiple browser windows to localhost, or the IP address displayed in the terminal -- this IP address should work for any device on the same WiFI, or local area network. Clicking on one of client instances should cause pink squares to appear at an equivalent location on all the client instances:
Deployment
At the end of [the previous post]({% post_url 2022-09-29-deno %}), we pushed our code to github and deployed it to the internet using Deno Deploy. However, in order for our code to work on Deno Deploy, we will need to make a couple of changes.
First, we won't need the local area network address, so we can delete this code from server.js:
import { getNetworkAddr } from "https://deno.land/x/local_ip/mod.ts"

const local_ip = await getNetworkAddr()
console.log (`local area network IP: ${ local_ip }`)
Second, the address we are passing to our WebSocket constructor needs to be changed from ws://localhost/. To find the address, go to Deno Deploy, log in, and click View. This should take you to the URL where your project has been deployed. Press cmd + L to highlight the URL, and copy it. My URL is https://capogreco-deno-server.deno.dev/ -- yours should be something similar.
Essentially, this is the address we want to give our WebSocket constructor in script.js, but we need to change the http at the start to be wss. So the address I need to give to my client script.js WebSocket constructor, is: wss://capogreco-deno-server.deno.dev/.
The prefix is to specify over what protocol the address is intended to be used. http is for hypertext transfer protocol, ws is for websockets, and wss is for WebSocket Secure protocol. One of the perks of Deno Deploy is it wants to run everything in the secure protocols: https, wss etc.
So instantiating the WebSocket object in script.js, for me, looks like this:
const socket = new WebSocket (`wss://capogreco-deno-server.deno.dev/`)Yours would be similar, but not identical.
Once you have made those changes, add / commit / push the project to github. This should deploy the code more or less instantaneously.
Open up some browser windows on your computer, your phone, your friends' devices, etc. and navigate to the URL. Clicking (or touching) will make a pink square appear on all concurrent visitors' screens, no matter where they are in the world.